Monday, May 1, 2023

Animated Forum Style "Solid Gold"


Solid Gold


This tutorial was written by me, VCC, on May 01, 2023 using my own ideas. Any resemblance to others is coincidental and accidental. This tutorial assumes you have a working knowledge of psp and is written in PSPX.


Supplies:

"Dragon With Egg" tube by Laguna - tube/license currently available at PFD


FILTERS:

Eye Candy 5_Textures

DSB Flux_Bright Noise


FONTS:

Signature Moments

                                                   Abbreviations:

DS_Drop Shadow

ANL_Add New Layer

EC_Eye Candy

GG_Gradient Glow

AS_Animation Shop

C/P_Copy and Paste

FF_Flood Fill

Ctrl+A_Select All

Ctrl+C_Copy

Ctrl+V_Paste

Ctrl+D_De-select

Ctrl+E_Paste Into Selected Frame/s

 Open blank 600x250 canvas

C/P tube, placing so the Gold Egg is filling canvas

Adjust_Blur_Radial Blur_Zoom_60_Elliptical_0_0_0

Move so the center of the blur is touching the center of the left side of the canvas

Crop to 600x250

Selection Tool_Rectangle

Make a selection, any size you like

Highlight blur layer_Promote Selection To Layer

Select None

Repeat for 2 more selected areas

Arrange as you like or as in my tag

Change Blend Modes of 2 of the selected areas to Multiply

Change Blend Mode of 3rd area to Luminance

DS each area 0_0_35_10_Black

Duplicate Background layer twice

On 1st copy, EC5_Textures_Swirl_Solid, Small No Twist setting

On 2nd copy_Effects_Distortion Effects_Pixelate_25_25

Effects_Edge Effects_Enhance

Blend Mode_Soft Light

C/P tube placing as shown

DS_0_0_65_25_Black

Magic Wand_Select the swirl design on the egg

Promote to layer 3 times

Select None

DSB Flux_Bright Noise_55_Mix

Repeat for other 2 promoted design layers, clicking MIX each time

Close bottom 2 design layers

Add wording of choice

Place all correct copyright/license information

Name_Signature Moments_12_Black

ANL to top

Select All_FF Black_Contract 2_Delete_Select none

ANIMATING

Animate as usual

Save!


Sunday, November 20, 2022

No Scraps Animated Forum Style "Made For Playing"


Made For Playing


This tutorial was written by me, VCC, on November 20, 2022 using my own ideas. Any resemblance to others is coincidental and accidental. This tutorial assumes you have a working knowledge of psp and is written in PSPX.


Supplies:

"Star Max" tube by Max 13 Tulmes/Hired Guns - tube/license currently available at PFD


FILTERS:

Mura's Meister_Copies

DSB Flux_Bright Noise

Mehdi_Sorting Tiles


FONTS:

Sketch Block

SundaySneakerFun

Abbreviations:

DS_Drop Shadow

ANL_Add New Layer

EC_Eye Candy

GG_Gradient Glow

AS_Animation Shop

C/P_Copy and Paste

FF_Flood Fill

Ctrl+A_Select All

Ctrl+C_Copy

Ctrl+V_Paste

Ctrl+D_De-select

Ctrl+E_Paste Into Selected Frame/s


This is a fast tut, so hang on!! LOL


Open blank 600x300 canvas

C/P tube placing so the number is the main part showing

Mura's Meister_Copies_Line_Default

Adjust_Blue Motion Blur_114_100

Repeat

Crop to 600x300

Duplicate

Mehdi_Sorting Tiles_300-500_300_Crossed

Move down once

Highlight top layer (blur)

Effects_Edge Effects_Enhance More

Blend Mode_Soft Light

Pen Tool_foreground #e2982a_background closed_line width 2_Diamond

Holding "shift" button down, draw diagonal lines matching the edges of the diamonds on the tag

Convert to raster

Duplicate twice

On each ;ayer_DSB Flux_Bright Noise_75

Click "MIX" each time

Close bottom two layers for now

C/P tube placinf so just the shoes show as shown

DS_0_0_10_50_10

DS_10_25_65_25_Black

Text Tool_SundaySneakerFun_#bd4e0f

Type your wording

DS_0_2_50_2_Black

Blend Mode_Burn

ANL to top

Ctrl+A

FF #e2982a

Contract 1_Delete

Contract 5_ FF #e2982a

Contract 1_Delete

Contract 5_ FF #e2982a

Contract 1_Delete

Ctrl+D

Duplicate

On bottom layer_DS 0_0_40_5_Black

On top layer_DSB Flux_Bright Noise_75

Add all correct copyright/license information

Name_ Sketch Block_28_#bd4e0f

Animate as usual

Sunday, November 6, 2022

Wallpaper_Happy Thanksgiving 2022

 Here is a wallpaper for your enjoyment.

It was made using the wonderful kit, "PFD Halloween" by Twins Angel & Devil Design

Click image, then save the full size wallpaper.


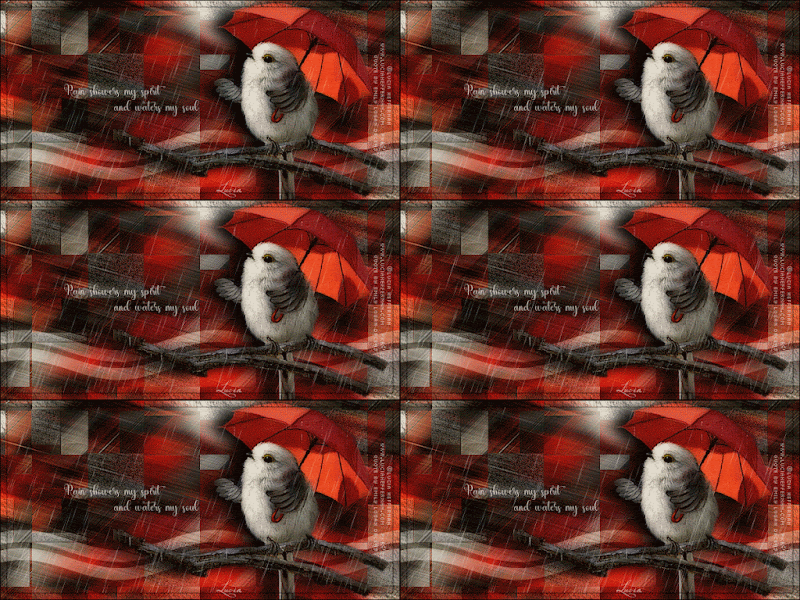
No Scraps Forum "Rain Showers"


Rain Showers


This tutorial was written by me, VCC, on November 06, 2022 using my own ideas. Any resemblance to others is coincidental and accidental. This tutorial assumes you have a working knowledge of psp and is written in PSPX.


Supplies:

"High and Dry" tube by Lucia Heffernan - this is a FTU artist who granted permission to use their art to Angels Design forum. PLEASE use a suitable tube that you have a license/permission for. DO NOT use this artists work unless you have permission.

Rain animation by Simone

Wording/Quote of choice


FILTERS:

Kiwi's Oelfilter_Zig-Zack

VM Distortion_Tiles A Go-Go

Mura's Meister_Copies

AAA Frames_Texture Frame


FONTS:

Plaster Of Paris

Abbreviations:

DS_Drop Shadow

ANL_Add New Layer

EC_Eye Candy

GG_Gradient Glow

AS_Animation Shop

C/P_Copy and Paste

FF_Flood Fill

Ctrl+A_Select All

Ctrl+C_Copy

Ctrl+V_Paste

Ctrl+D_De-select

Ctrl+E_Paste Into Selected Frame/s


Open blank 600x300 canvas

C/P tube

Mura's Meister_Copies_Wallpaper Rotate_Default

Adjust_Blur_Motion Blur_60_100

Repeat Blur

Effects_Edge Effects_Enhance

Duplicate this layer

Kiwi Oelfilter_Zig-Zack_56_80_128_128

**NOTE: This filter is notoriously cranky, so you may have to adjust the settings to your liking**

VM Distortion_Tiles a GoGo_32_0_207_163

Blend Mode_Soft Light

Selection Tool

Select random areas of the GoGo layer


Delete

Highlight the bottom blur layer

Promote Selection To Layer

Ctrl+D

Add Noise_Uniform 35

Rectangle Shape Tool_Stroke 0_Fill White

Draw a narrow strip across tag going past the edges a ways

Convert to raster

Effects_Distortion Effects_Wave_5_45_5_45_Transparent

Duplicate

Move down slightly as shown

Merge wave lines together

Blend Mode_Soft Light

C/P tube placing as shown

EC5_Impact_Perspective Shadow_Drop Shadow_187_24.19_97_26.21_Black_Mask Selection

Crop to 600x300

Copy Merged

Paste as new layer to the top

AAA Frames_Texture frame_Change top number to 10

Select All_Contract 11_Delete_Select none

Add wording of choice and all correct copyright/license information

Opacity of these layers_65

Name_Plaster Of Paris_22_White

Opacity_65

Hide the name, wording, credits, and frame

Copy Merged

AS:

Paste as new animation

Ctrl+L until you have 15 frames

Ctrl+A

Open Rain animation by Simone

Resize by 50%

Ctrl+A

Ctrl+M

Ctrl+C

Highlight your tag

Ctrl+A

Ctrl+E placing to the left

Click mouse button to set

Ctrl+E place to the right covering tag

Click mouse to set

Back to PSP:

Open frame layer

Copy

AS_Paste as new animation

Ctrl+C

Be sure the "Propagate Paste" button in tool bar is clicked (looks like 3 sheets of paper)

Highlight tag

Roll mouse to enlarge slightly

Ctrl+A

Ctrl+E

Click mouse to set (if you enlarged slightly, it should automatically be centered)

PSP:

One at a time, copy the name, credits, and wording layers

*AS_Paste each as new animation

Ctrl+C

Highlight tag

Ctrl+A

Ctrl+E

Place each where you like

Click mouse to set*

Repeat from * to * for each wording, credit, and name layer

View Animation

If happy, save!


This set was made using the wonderful art of Amberly Berendson.

Tube/license currently available at Digital Art Heaven


Thursday, October 6, 2022

No Scraps Forum Style Tutorial "Cemetery Night"

 Cemetery Night


This tutorial was written by me, VCC, on October 08, 2022 using my own ideas. Any resemblance to others is coincidental and accidental. This tutorial assumes you have a working knowledge of psp and is written in PSPX.


Supplies:

"Gravedigger Pumpkin" tube by Meg Baker_Ms. Baker is no longer selling tubes, so please use a suitable replacement

Tombstone by me_tutorial HERE

VCC Template_23 HERE


FILTERS:

Mura's Meister_Cloud


FONTS:

Abbreviations:

DS_Drop Shadow

ANL_Add New Layer

EC_Eye Candy

GG_Gradient Glow

AS_Animation Shop

C/P_Copy and Paste

FF_Flood Fill

Ctrl+A_Select All

Ctrl+C_Copy

Ctrl+V_Paste

Ctrl+D_De-select

Ctrl+E_Paste Into Selected Frame/s


When working with templates, always Shift+D to duplicate, close original.

On each layer, either:

A: Select with magic wand

B: Ctrl+A, Ctrl+F. Ctrl+Shift+F (select all, float, de-float)

ANL, do the tutorial steps required

Close/delete original template layer 

B: Use the Manual Color Correction Tool

*Note: "B" is the option I use, so you may need to select your layer first before adding any effects*


Delete/hide all heart and credits layers

Foreground: #808080 Background: #c0c0c0

Narrow Rectangle_Select All_Float_De-Float

ANL

Mura's Meister_Cloud_Default

**Narrow Rectangle Frame_ #f3a115

Adjust_Add Noise_Uniform 40

Magic Wand_Select inside the frame_Invert_DS 0_0_100_15_Black

Select None**

Change Foreground color to #202020

Rectangle_ Select All_Float_De-Float

ANL_Apply Cloud again, clicking "reset"

Rectangle Frame_Repeat from ** to **

Rectangle_ Select All_Float_De-Float

C/P tube image, placing where you like it

Invert_Delete_Select none

C/P tube

Aligh tube with the image below

Duplicate_Gaussian Blur 5_Overlay

Original Tube_DS_0_0_45_15_Black

***OPTIONAL: Tag Sample 2;

Do the "Tombstone" tutorial HERE

C/P completed tombstone, placing as shown

Duplicate_Using nodes, rotate slightly as shown

Repeat tube DS

Selection Tool_Point To Point_Select the parts of the "image" that show behind the tombstones_Delete_Select none (don't remove too much, just enough so it looks nice)***

Add all correct copyright/license information

Name_ Thanks_72_Black

Save!

Template 23

 Made a new template today for a tag I was making.

Click HERE for the tutorial using this template.


Download at BOX

Tuesday, September 27, 2022

No Scraps Tutorial - "My Attitude"

My Attitude


This tutorial was written by me, VCC, on September 23, 2022 using my own ideas. Any resemblance to others is coincidental and accidental. This tutorial assumes you have a working knowledge of psp and is written in PSPX.


Supplies:

"Tera" tube by Armando Huerta - Mr. Huerta's art is no longer sold as tubes, so please use a suitable replacement.

My Word Art below - click image, then right click and save the full size png


FILTERS:

Xero_Fritillary

Toadies_What Are You?

Eye Candy 4000_Gradient Glow


FONTS:

Bank Gothic

Abbreviations:

DS_Drop Shadow

ANL_Add New Layer

EC_Eye Candy

GG_Gradient Glow

AS_Animation Shop

C/P_Copy and Paste

FF_Flood Fill

Ctrl+A_Select All

Ctrl+C_Copy

Ctrl+V_Paste

Ctrl+D_De-select

Ctrl+E_Paste Into Selected Frame/s


Open blank 600x600 canvas

Pre-Set Shape_Square_Stroke 10_Fill closed

Draw a square that fits nicely with your tube

Align Center of tag

Convert to raster

Free Rotate_Left 45

Duplicate twice

Set Foreground to a light color from tube_Background to Black

On bottom square layer_Toadies_What Are You?_20_20

Repeat Toadies, What Are You?

Highlight middle square layer_Gaussian Blur 5

Highlight top square layer

Close out any background you may have so you see the Gray/White squares

Pen Tool_Stroke 10 your light color_Fill closed

Draw a line diagonal across your square

Align Center of tag

Convert

Duplicate

Move over to the next diagonal white squares

Continue duplicating and moving over until you reach the black edge

Merge lines together


Duplicate_Mirror:

Merge down

Highlight top Black square

Select All_Float_De-Float_Contract by1_Invert

Highlight merge lines layer_Delete_Select none


**Note: If you have solid lines covering the Black edge, select them with
your selection tool, then delete. Finished frame should look like the above image.**


Now, grab your Magic wand

**Select the first Purple square

Skip 2, select the next Purple square

Continue selecting every 3 Purple squares around tag

Promote to layer

Adjust_Brightness/Contrast_25_10

Repeat

Add noise_Gaussian 25

Select none**

Repeat from ** to ** until you have 3 layers of brightened, noise square layers

Close the middle 2 for now

Magic Wand_Select inside the top Black square_Expand by 5

ANL below all Black squares

FF with you light color

Xero_Fritillary_5_30_10_10

Select None

C/P tube, placing to the left

Duplicate

Bottom tube_Gaussian Blur 5

Duplicate

Blend Mode_Multiply

Top tube_Duplicate

Blend Mode-Overlay

C/P word art

Duplicate

On original_EC4000_GG_3_25_100_#b5b2d8

Add all correct copyright/license information

Name_Bank Gothic_36_Black

Free Rotate Left 45

DS_2_5_50_5

Animate as usual

Save and enjoy!!


Wednesday, September 21, 2022

Pixel Tombstone Tutorial

Pixel Tombstone


This tutorial was written by me, VCC, on September 21, 2022 using my own ideas. Any resemblance to others is coincidental and accidental. This tutorial assumes you have a working knowledge of psp and is written in PSPX. 

**I was searching for Halloween pixel tutorials and never found one for a tombstone, so

figured I would make my own, LOL. Hope you all like this tutorial and have fun making it. It's my first pixel tut ever!!**

Supplies:

No outside supplies needed 

FILTERS:

No outside filters 

FONTS:

No Fonts

Abbreviations:

DS_Drop Shadow

ANL_Add New Layer

EC_Eye Candy

GG_Gradient Glow

AS_Animation Shop

C/P_Copy and Paste

FF_Flood Fill

Ctrl+A_Select All

Ctrl+C_Copy

Ctrl+V_Paste

Ctrl+D_De-select

Ctrl+E_Paste Into Selected Frame/s


Open blank 200x200 canvas

Using your mouse wheel, enlarge to 800%

Paint Brush Tool_#404040

Use the following settings:

Clicking in each square, follow the outline below:


Magic Wand_Click outisde the outline

Invert

ANL below outline

FF #808080

Effects_Texture Effects_Texture:


ANL

DS_0_0_100_15_Black

Repeat DS

Select none

Merge visible

That's it!

Now you can add it to a tag, blinkie, or whatever you think of!


Tuesday, September 20, 2022

No Scraps Forum_"Beware!"

 Beware! 


This tutorial was written by me, VCC, on September 20, 2022 using my own ideas. Any resemblance to others is coincidental and accidental. This tutorial assumes you have a working knowledge of psp and is written in PSPX. 

Supplies:

"Miss Muffet" tube by Suzanne Woolcott_Ms. Woolcott is no longer selling tubes, so please use a suitable replacement

"Fresh Blood" texture pack by Expose42

"Texture Pack 58" by Carllton

Web or Web brush of choice

Grunge brushes of choice


FILTERS:

Filters Unlimited 2_Paper Textures_Canvas, Fine

Mura's Meister_ Perspective Tiling and Cloud

DSB Flux_Bright Noise


FONTS:

Mon Amour Script Pro

Moneymachine PERSONAL

Monster Bites


Abbreviations:

DS_Drop Shadow

ANL_Add New Layer

EC_Eye Candy

GG_Gradient Glow

AS_Animation Shop

C/P_Copy and Paste

FF_Flood Fill

Ctrl+A_Select All

Ctrl+C_Copy

Ctrl+V_Paste

Ctrl+D_De-select

Ctrl+E_Paste Into Selected Frame/s


Open blank 600x300 canvas

ANL

Set your colors to #606060 and #c0c0c0

Mura's Meister_Cloud_Default

ANL

CTRL+A

C/P texture paper Carllton 4 into selection

Ctrl+D

Blend Mode_Soft Light_Opacity 23

ANL

CTRL+A

C/P texture paper Carllton 2 into selection

Ctrl+D

Filters Unlimited 2_Paper Textures_Canvas, Fine

Repeat Canvas, Fine

Blend Mode_Soft Light_Opacity 27

ANL

CTRL+A

C/P texture paper Expose 11 into selection

Ctrl+D

Magic Wand_Select  the light part

Invert_Delete_Ctrl+D

Selection Tool_Freehand

Select around the area you want to remain

Selections_Feather 50

Invert_Hit delete until it looks good to you

Ctl+D

Blend Mode_Soft Light_Opacity 49

ANL

CTRL+A

C/P texture paper Expose 5 into selection

Ctrl+D

Blend Mode_Multiply

Copy Merged

Paste As New Layer

Mura's Meister_Perspective Tiling_Default

Move this layer down as shown to look like the floor

DS_0_0_50_10_Black

ANL
Brush Tool_Web

Foreground Color_White

Click in top right corner once

Change web size to a smaller number

Click once in top left corner as shown

Duplicate web layer twice

On top web layer_DSB Flux_Bright Noise_55

Repeat on remaining Web layers, clicking MIX each time

Close bottom 2 web layers for now

ANL

Using brushes of choices, decorate your back "wall"

I used Black with Opacity at around 20 on each layer

Place brush layers directly above the last texture layer

Text Tool_ Mon Amour Script Pro_72_White

Type "beware" and place in the top left corner

Opacity_7

Text Tool_ Moneymachine PERSONAL_72_White

Type "beware" and place to the bottom right as shown

Opacity_10

C/P tubes, placing as shown

ANL

CTRL+A

FF with Foreground/Background gradient_ #b85167 and Black_Angle 45_Repeat 5

Contract by 5_Delete

ANL

CTRL+A

FF Black

Contract by 2_Delete_Ctrl+D

Sharpen More and repeat DS on Gradient frame layer and tubes

Add correct copyright/license information

Name_ Monster Bites_36_Black

Repeat DS


ANIMATING


Animate as usual

Save!