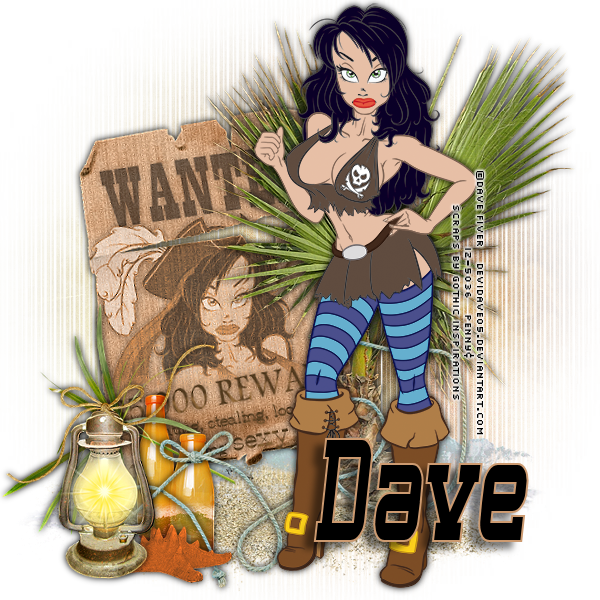
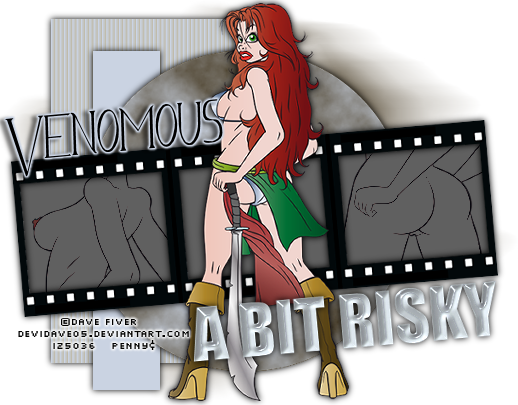
Showing posts with label Dave Fiver. Show all posts

Monday, September 17, 2012

Snags - Love

Snags made with
“Teddies Kiss” tube by Dave Fiver available at indie-Zine
“Second Chance” FTU scrap kit by Let Me Scrapbook

Click on image, then right click and save the full size png


FTU - Love


Love


Supplies:

“Teddies Kiss” tube by Dave Fiver available at indie-Zine
“Second Chance” FTU scrap kit by Let Me Scrapbook
Flaming Pear_Super Blade Pro_M. Coconut Ice
2 Fonts_1 for wording (Poornut) and 1 for name (Husky Stash)


Open 600x600 blank canvas
C/P Paint
C/P Journal Tag
C/P Frame 1_select inside_expand 5
Add new layer below frame_FF with last color in color palette supplied with kit
Effects_Blinds_10_60_4th color in palette_Horizontal un-checked
C/P the following elements, duplicating, re-sizing, mirroring, and placing as shown:
Flower 1
Flower 2
Flower 3
Leaf
String
Tree
C/P tube
Draw a circle using your vector tool_Make it the size of the frame and move below frame
Text tool_Poornut_100_Stroke 2 (3rd color)_fill 5th color_highlight top layer in palette
Hold your text tool close to the circle until it has the half circle under the A
Type out your message_Convert to raster_delete circle
Select all_Float_De-Float_Flaming Pear_Super Blade Pro_M. Coconut Ice_Default settings_Select none
DS_0_0_50_10_Black
Move to top of frame but behind flowers and trees
Add all correct copyright/license information
Add name_Husky Stash_150_Stroke 2 (3rd color)_Fill Black
DS all remaining layers_0_0_100_10_Black
Save!!


Monday, September 10, 2012

FTU - Sexy Pirate


Sexy Pirate


 This tutorial was written by me on September 10, 2012, using my own ideas. Any resemblance to others is coincidental and accidental. This tutorial assumes you have a working knowledge of psp and is written in PSPX.
Please leave some love when downloading supplies. The artists/creators work hard to make/share their work with us, so let's be appreciative. Please use all correct copyright information and follow all TOU’s. Let’s give credit where credit is due.
As always, tutorials are only a guideline. If you don't have the exact supplies, use ones you have or ones you choose.


Supplies:

“Buccaneer” tube by Dave Fiver available at indie-Zine
“Catch A Wave” Sampler FTU scrap kit by Gothic Inspirations
Filters Unlimited 2 – Aged Film
Fonts_SF Big Whiskey Condensed (name) - Alfredo's Dance (small writing) - Anderson Thunderbirds Are GO! (Wanted!)


Abbreviations:
EC = Eye Candy
GG = Gradient Glow
DS = Drop Shadow
C/P = Copy and Paste
FF = Flood Fill


Open blank 600x600 canvas
Add new layer – select all
C/P paper 2 into selection – select none
Apply mask

To make the Wanted poster:

C/P  parchment – shift+D and make narrower
Font_ Anderson Thunderbirds Are GO!_100_Black_type out “WANTED”
Use nodes to tilt a little to match angle of parchment
Convert to raster
Parchment layer_select all_float_de-float
C/P tube close up
Position then promote to layer – select none – delete original tube
Font_ Alfredo's Dance_72_Black_type out message – I used “$5,000 REWARD”_size 40_ “Pirating, stealing, looting, being”_size 60_ “SEXY”
Angle this wording to match parchment
Merge 2 word layers
Effects_Cutout_10_10_50_5_fill with #b07f48
Apply the following to the tube and parchment layers_
Filters Unlimited 2_Special Effects 1_Aged Film_Default settings
DS words and tube_0_0_50_10_Black
Merge parchment, tube, and wording together
Shift+D again and angle it slightly

Now for the rest of the tag:

C/P the following elements placing as shown:
Bottles
Greenery
Lantern
Ocean
Palm
Sand
Sealife
String
C/P tube
DS all layers_0_0_100_10_Black
Add all correct copyright/license information
Add name_ SF Big Whiskey SC_120_stroke 2 #cc9a70_fill Black
DS name_7_-20_50_10_Black
Save!!


Wednesday, September 5, 2012

FTU - Surfin' Fun


Surfin’ Fun


This tutorial was written by me on September 05, 2012, using my own ideas. Any resemblance to others is coincidental and accidental. This tutorial assumes you have a working knowledge of psp and is written in PSPX.
Please leave some love when downloading supplies. The artists/creators work hard to make/share their work with us, so let's be appreciative. Please use all correct copyright information and follow all TOU’s. Let’s give credit where credit is due.
As always, tutorials are only a guideline. If you don't have the exact supplies, use ones you have or ones you choose.


Supplies:

“Beach Belle” tube by Dave Fiver available at indie-Zine
“Bye Bye Summer” FTU scrap kit by Scrappin’ Mar
Font_HavingWrit Heavy


Abbreviations:
EC = Eye Candy
GG = Gradient Glow
DS = Drop Shadow
C/P = Copy and Paste
FF = Flood Fill


Open 600x600 blank canvas
Add new layer – FF with gradient of choice
Apply mask
C/P element 15
Select inside of frames – expand by 3
Add new layer below frame
C/P paper 1 into selection
C/P tube close up – position as desired – promote to layer
Select none – delete original tube layer
C/P the following elements, placing as shown:

6
7
8
9
10
17
C/P tube
Add all correct copyright/license information
Add name_Having Writ Heavy_100_Stroke 2 - #fff975_Fill - #eeb91d
DS all layers_0_0_100_10_Black
Save!!


Friday, August 17, 2012

Snags - Yum Yum Dance

These snags made with:

“Scarlett Loves Her Pajamas” tube by Dave Fiver available at indie-Zine
“Yum Yum” FTU scrap kit by JRB Scraps


FTU - Yum Yum Dance


Yum Yum Dance


This tutorial was written by me on August 17, 2012, using my own ideas. Any resemblance to others is coincidental and accidental. This tutorial assumes you have a working knowledge of psp and is written in PSPX.
Please leave some love when downloading supplies. The artists/creators work hard to make/share their work with us, so let's be appreciative. Please use all correct copyright information and follow all TOU’s. Let’s give credit where credit is due.
As always, tutorials are only a guideline. If you don't have the exact supplies, use ones you have or ones you choose.


Supplies:

“Scarlett Loves Her Pajamas” tube by Dave Fiver available at indie-Zine
“Yum Yum” FTU scrap kit by JRB Scraps – I don’t have a current link for JRB, so if anyone knows one please let me know.
Becky Mask009
Eye Candy 4000 – Gradient Glow
Font_Calvin and Hobbes


Abbreviations:
EC = Eye Candy
GG = Gradient Glow
DS = Drop Shadow
C/P = Copy and Paste
FF = Flood Fill


This is a quick, fun tut!!

Open blank 600x600 canvas
Add new layer – select all
C/P paper 7 into selection – select none
C/P the following elements:
1
20
25
C/P tube
Add all correct copyright/license information
Add name_Calvin and Hobbes_72_Black
EC 4000_GG_3_25_100_#ff3dff
Repeat GG same settings
DS name_2_-5_50_5_rainbow gradient
DS all other layers_0_0_100_10_Black
Save!!


Snags - Buggy Dance

Snags made with:
“ScarlettLovesHerPajamas” tube by Dave Fiver available at indie-Zine
Bug Me” FTU scrap kit by Ladyhawwk Designs

FTU - Buggy Dance


Buggy Dance


This tutorial was written by me on August 17, 2012, using my own ideas. Any resemblance to others is coincidental and accidental. This tutorial assumes you have a working knowledge of psp and is written in PSPX.
Please leave some love when downloading supplies. The artists/creators work hard to make/share their work with us, so let's be appreciative. Please use all correct copyright information and follow all TOU’s. Let’s give credit where credit is due.
As always, tutorials are only a guideline. If you don't have the exact supplies, use ones you have or ones you choose.


Supplies:

“Scarlett Loves Her Pajamas” tube by Dave Fiver available at indie-Zine
Bug Me” FTU scrap kit by Ladyhawwk Designs
Gems Mask60
Font – Ultraworld
Eye Candy 5 – Impact – Glass


Abbreviations:
EC = Eye Candy
GG = Gradient Glow
DS = Drop Shadow
C/P = Copy and Paste
FF = Flood Fill


Open blank 600x600 canvas
Add new layer – select all
C/P paper 5 into selection
Select none – apply mask
C/P frame1
Select inside – expand_5
In red frame_C/P paper 1 as new layer – move so parts you like show
Promote to layer – delete original paper
C/P tube_promote to layer_delete origina; tube
Repeat for cream frame using paper 3 and the second tube
Select none
Add the following elements:
5
6
10
11
17
Add all correct copyright/license information
Add name_Ultraorld_72_stroke 3_#ff1800_fill Black
Convert to raster
Select the red outline - add noise_60 – select none
Select the black lettering_EC5_Impact_Glass_Default settings
Select none
DS beaded butterfly and beaded flower_0_0_50_5_Black
DS all others_0_0_100_10_Black
Save!!!


Monday, July 23, 2012

FTU - Sexy and I Know It


Sexy and I Know It


This tutorial was written by me on July 23, 2012, using my own ideas. Any resemblance to others is coincidental and accidental. This tutorial assumes you have a working knowledge of psp and is written in PSPX.
Please leave some love when downloading supplies. The artists/creators work hard to make/share their work with us, so let's be appreciative. Please use all correct copyright information and follow all TOU’s. Let’s give credit where credit is due.
As always, tutorials are only a guideline. If you don't have the exact supplies, use ones you have or ones you choose.


Supplies:

“Reina” tube by Dave Fiver available at indie-Zine
“From the Heart” FTU mini scrap kit by Chas Scrap N Bitz
Becky Mask 009
Sexy” word art
Font of choice – this one is “Comic Sans”
Eye Candy 4000 – Gradient Glow


Abbreviations:
EC = Eye Candy
GG = Gradient Glow
DS = Drop Shadow
C/P = Copy and Paste
FF = Flood Fill


Open a blank 600x600 image
Add new layer
FF #e31d74
Apply mask
C/P the following elements, re-sizing, duplicating as needed:
Pink Heart
Frame
Black Frame
Heart Arrow
Heart Doodle
Paper Rose
Black Hearts
Splatter
Skyline
3 leaf
Chrome Flower
Confetti 2
Leaf
Halftone
C/P word art
EC 4000 – GG_3_25_100 #b38e5d
Sharpen more
C/P tube
DS_0_0_100_10_Black
Add all correct copyright/license information
Add name_Comic Sans_72_Black
EC 4000 – GG_3_25_100_#e31d74
Sharpen more
Repeat DS
Save and enjoy!!

Tuesday, July 17, 2012

AC WARNING - Risky


Risky


This tutorial was written by me on July 16, 2012, using my own ideas. Any resemblance to others is coincidental and accidental. This tutorial assumes you have a working knowledge of psp and is written in PSPX.
Please leave some love when downloading supplies. The artists/creators work hard to make/share their work with us, so let's be appreciative. Please use all correct copyright information and follow all TOU’s. Let’s give credit where credit is due.
As always, tutorials are only a guideline. If you don't have the exact supplies, use ones you have or ones you choose.


Supplies:

“Red Sonya” tube by Dave Fiver available at indie-Zine
Template 178 by Missy
Eye Candy 4000 – Gradient Glow
Flaming Pear – Super Blade Pro – Clear Glass
Mura’s Meister Cloud
Becky_Mask023


Abbreviations:
EC = Eye Candy
GG = Gradient Glow
DS = Drop Shadow
C/P = Copy and Paste
FF = Flood Fill


Open template in psp
Select rectangle 1
FF #cad3e2
Blinds effects_5_27_ #aa8327_uncheck horizontal
Select none
Select rectangle 2
FF #cad3e2
Select none
Select circle
FF #43361e
Mura’s Meister Cloud_100_100_3_0_0_0_0_0_0
Light_White
FG_#43361e
BG_#cad3e2
Select none
Select the film strip background
Expand by 3
C/P tube so parts you want show thru frames
Promote selection to layer
Select none
Change blend mode to Darken
Bring original tube to top and place to your liking
Add a new layer
FF #cad3e2
Highlight Words layer
Select all_Float_Defloat
Promote selection to layer
Delete FF layer
Still selected_Flaming Pear_Super Blade Pro_Clear Glass
Select none
Delete original word layer
Bring glass words to top
Add new layer to bottom of palette
FF #43361e
Apply mask
DS all layers_0_0_100_10_Black
Add all correct copyright/license information
Add name_Avanti_72_Black
EC 4000 – GG_3_25_100_#cad3e2
DS_2_-5_50_5_Black
Save and enjoy!1