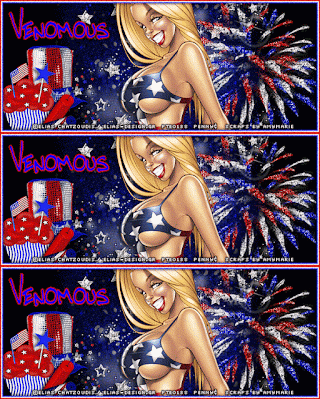
Showing posts with label Elias Chatzoudis. Show all posts

Sunday, January 24, 2021

No Scrap Tutorial "Rapid Elias"

 Rapid Elias


This tutorial was written by me on January 23, 2021 using my own ideas.

Any resemblance to others is coincidental and accidental.

This tutorial assumes you have a working knowledge of psp and is written in PSPX.


Supplies:

Tube by Elias Chatzoudis_This tube was purchased when Elias was with the PTE store, which has since closed. His tubes can currently be purchased at CDO

Template 142 by Scraps Of Enchantment 

Filters:

Filters Unlimited 2_Paper Textures_Canvas, Fine

Xero_Fritillary

Eye Candy 5_Impact_Perspective Shadow


Fonts:

Rapid Squad


Abbreviations:

DS_Drop Shadow

ANL_Add New Layer

EC_Eye Candy

GG_Gradient Glow

AS_Animation Shop

C/P_Copy and Paste

FF_Flood Fill

Ctrl+A_Select All

Ctrl+C_Copy

Ctrl+V_Paste

Ctrl+D_De-select

Ctrl+E_Paste Into Selected Frame/s


When working with templates, always Shift+D to duplicate, close original.

On each layer, either:

A: Select with magic wand

B: Ctrl+A, Ctrl+F. Ctrl+Shift+F (select all, float, de-float)

ANL, do the tutorial steps required

Close/delete original template layer


To recolor a layer:

A: ANL and FF with desired color

B: Use the Manual Color Correction Tool


Let's go!!

BG_Leave as is

1_ #774067

Xero_Fritillary_5_30_40_20

Magic Wand_Select the 2 white strips

Promote to layer

Change color to #bb7b9e

Effects_Texture Effects_Blinds_10_20_ #cc96bb_Both boxes checked

2_ #e6bbd0

Add Noise_Uniform 40

DS_0_0_100_10_Black

3_ #b97799

Effects_Texture Effects_Weave_1_10_1_Both Boxes #d5a9bf

DS_0_0_100_10_Black

4_ #e6bbd0

Add Noise_Uniform 40

DS_0_0_100_10_Black

5_ #b97799

FU2_Paper Textures_Canvas, Fine_156_87

C/P tube close up, placing desired area inside selection

Invert_Delete_Select none

Blend Mode_Soft Light

Opacity_40

DS_0_0_100_10_Black

6_ DS_0_0_100_10_Black

7_ DS_0_0_100_10_Black

8_ #f4cce1

Add Noise_Uniform 25

9_ #763f66

Effects_3D Effects_Inner Bevel_Bevel 8_10_15_7_-10_35_White_225_35_60

DS_0_0_100_10_Black

10_ DS_0_0_100_10_Black

8_ #f4cce1

Add Noise_Uniform 25

11_ #763f66

Effects_3D Effects_Inner Bevel_Bevel 8_10_15_7_-10_35_White_225_35_60

DS_0_0_100_10_Black

13_Close/Delete

14_ #763f66

Effects_3D Effects_Inner Bevel_Bevel 8_10_15_7_-10_35_White_225_35_60

DS_0_0_100_10_Black

15_ #763f66

Effects_3D Effects_Inner Bevel_Bevel 8_10_15_7_-10_35_White_225_35_60

DS_0_0_100_10_Black

C/P tube

EC5_Impact_Perspective Shadow:

Drop Shadow_330_13.89_86_26.21_Black_Mask Selection

ANL_#5d2f50

Ctrl+A_Contract 2_Delete_Ctrl+D

DS_0_0_100_10_Black

Add all correct copyright/license information

Name_ Rapid Squad_72_ #d5a9bf

Add Noise_Uniform_20

DS_2_2_100_3_Black

Save!!


Friday, June 1, 2018

FTU "Ice Cream"


"Ice Cream"


This tutorial was written by me on March 01, 2018 using my own ideas.

Any resemblance to others is coincidental and accidental.

This tutorial assumes you have a working knowledge of psp and is written in PSPX6.

 
Supplies:

"Sunny Babe" tube by Elias Chatzoudis - tube/license currently available at Elias' store and at CDO
 
Filters:
Eye Candy 5_Impact
 
Fonts:
Ice Cream Soda Font
 
Abbreviations:
DS_Drop Shadow
ANL_Add New Layer
EC_Eye Candy
GG_Gradient Glow
AS_Animation Shop
C/P_Copy and Paste
FF_Flood Fill
 
 
When working with templates, always Shift+D to duplicate, close original,
then on each layer, select with magic wand (or Select All, Float, De-float), ANL,
close/delete the original, do steps required in tutorial, select none
 
ANL to bottom
Make a gradient using #224e68 and #82a435
Sunburst_repeats 7_H&V 50
FF new layer
Apply mask
Adjust_Add Noise_Uniform_25
1_#224e68
2_#86d9db
Add Noise_Uniform_45
3_#86d9db
Add Noise_Uniform_45
4_#990d0d
5_#990d0d
6_#82a435
7_Leave as is
8_#224e68
9_#224e68
Add Noise_Uniform_45
10_Close/Delete
11_#82a435
12_Leave as is
13_#224e68
Add Noise_Uniform_45
14_#86d9db
Add Noise_Uniform_45
15_#82a435
16_#990d0d
17_#82a435
18_Hmmm, guess designer skipped a number
19_#fb1217
C/P tube placing as shown
Add the following elements, re-sizing, duplicating, mirroring, placing as shown/said:
Mesh 01_place directly above template layer 11
Chocolate Drops_place directly above the Mesh 01
Clock
Flower 02
Sign
Hibiscus 02
Doodle
Star
Element 01_Pink Ice Cream Heart
Cherries
Element 06_Blue Ice Cream Heart
Element 03_Green Ice Cream Heart
Cookie
Daisy Chain
Dessert 01
Chocolate Shake
Sunglasses 01
DS all layers except mask_2_2_100_10_Black
Add all correct copyright/license information
Name_IceCream Soda_100_#86d9db
EC 5_Impact_GG:
 
 
DS_1_2_100_5_Black
Save!!


Saturday, September 28, 2013

No Scraps Forum Set - Franky


Franky


This tutorial was written by me on September 28, 2013, using my own ideas. Any resemblance to others is coincidental and accidental. This tutorial assumes you have a working knowledge of psp and is written in PSPX.
Please leave some love when downloading supplies. The artists/creators work hard to make/share their work with us, so let's be appreciative. Please use all correct copyright/license information and follow all TOU’s. Let’s give credit where credit is due.
As always, tutorials are only a guideline. If you don't have the exact supplies, use ones you have or ones you choose.


Supplies:

“Frank” tube by KiwiFire Storm – tube/license available at TPP
Template 144 by Spawn
Mura’s Meister_Cloud
Artistic_Dry Brush
Balder Olrik_Harmonizer2
Eye Candy 4000_Gradient Glow
Tronds II_Ghost
Toadies_Blur Em!
DSB Flux_Blast
Font_ Blood Of Dracula


Abbreviations:
EC = Eye Candy
GG = Gradient Glow
DS = Drop Shadow
C/P = Copy and Paste
FF = Flood Fill
ANL = Add New Layer
AS = Animation Shop


When working with templates, always Shift+D to duplicate, close original, then on each layer...select all/float/de-float or use magic wand to select, ANL, do steps required in tutorial, and close/delete the original layer.


ANL above Foreground Rectangle
Mura’s Meister_Cloud:


ANL_FF #1e1b4e
Blend Mode_Hard Light_Opacity 60
Duplicate
Top layer_Tronds II_Ghost_Default
2nd layer_Tronds II_Ghost_change control light to 152
Close layer 2 for now


Magic wand_Select the Foreground rectangle_Invert_Delete_Keep Selected

C/P tube close up and position so eyes are showing in selection_Delete (selection should still be inverted)_Select none
Artistic_Dry Brush_Default
Balder Olrik_Harmonizer2_Default
Opacity_17
Duplicate
Effects_Artistic effects_Brush Strokes:


ANL above Background Squares layer
FF #1e1b4e
Highlight Background Squares layer_Select all_Float_De-float_Invert
Highlight FF layer_Delete_Select none
EC 4000_GG_3_25_100_#edf7fc

Choose 2 colors from tube_I chose #1e1b4e and #edf7fc
Gradient_Foreground/Background:


ANL above Foreground Squares_ Select all_Float_De-float_Invert
Highlight Foreground Squares layer_Select all_Float_De-float_Invert
Highlight FF layer_Delete_Select none
Add noise_Uniform_50

Merge these 2 layers together
Duplicate
On duplicate_ DS_0_0_100_10_Black
Highlight original_Toadies_Blur Em!_Default
Opacity_30

Highlight Background Rectangle layer_select with magic wand
ANL_FF #1e1b4e_Select none
Repeat GG
Repeat DS

Select border with magic wand_ ANL_FF #1e1b4e_Select none
Repeat GG
Repeat DS 3 times
 
C/P tube_re-size_move below border and place as shown
Sharpen
Duplicate
On original_Adjust_Blur_Gaussian_15
DSB Flux_Blast:


Effects_Edge Effects_Enhance

Add all correct copyright/license information

Shift+D to duplicate (will use this copy for avatar shortly)

On original tag canvas:
Name_Blood Of Dracula_72_#1e1b4e
Convert to raster
Repeat GG
DS_0_0_100_30_Black

AVATAR:

Working with duplicate of tag, re-size_all layers checked_85% twice
Crop tool set to 150x150
Select area you want for your avatar
Crop
ANL_FF #1e1b4e
Select all_Contract 1_Delete_Select none

Repeat GG
Repeat DS 3 times

If you have any of the tube on the avatar, add all correct copyright/license information

Name_Blood Of Dracula_72_#1e1b4e
In text box, highlight all but first letter_Change size to 48
Convert to raster
Repeat GG
DS_0_0_100_30_Black

If you want the avi animated, repeat the animating steps below.
If not, simply save!!!


Animating:

Copy merged
Go to AS_Paste as new image

Back to PSP_close Copy of background and open 2nd background layer
Copy merged
AS_paste after frame

Highlight layer 1_Frame Properties_75
Highlight layer2_Frame Properties_5
Duplicate frame2

Save!!!


Here's another example using the awesome art of Elias Chatzoudis


Thursday, June 14, 2012

PTU - Firecracker Forum Set


Firecracker Forum Set


 This tutorial was written by me on June 14, 2012, using my own ideas. Any resemblance to others is coincidental and accidental. This tutorial assumes you have a working knowledge of psp and is written in PSPX.
Please leave some love when downloading supplies. The artists/creators work hard to make/share their work with us, so let's be appreciative. Please use all correct copyright information and follow all TOU’s. Let’s give credit where credit is due. ??
As always, tutorials are only a guideline. If you don't have the exact supplies, use ones you have or ones you choose.


Supplies:

“American Beauty” tube by Elias Chatzoudis available at PTE – please do not use this same tube without the proper license
Southern Firecracker” PTU scrap kit by AmyMarie available at Artistic Reality Talent
Mask of choice – I used Becky_Mask009
Eye Candy 4000 – Gradient Glow
Font of choice – Mine is Gilbert Regular
“Firecracker” word art by me_click image, then right click and save the full size png


To save time, I use the following abbreviations:
C/P = copy/paste
DS = drop shadow
FF = Flood Fill


This is a 3 part tut…

Part 1 – Tag


Open a 600x600 blank image in psp
Add new layer
Select all – C/P paper 012 into selection – select none
Open mask in psp
Layers – New Mask Layer – From Image – Choose your mask
Merge group
C/P the following elements and place as shown:
Sparkles2
Metalstars
Firework1
Firework2
Firework3
Cupcake1
Firecracker2
Firecracker3
Hat
C/P tube as new layer and position
C/P word art as new layer
Eye Candy 4000 – Gradient Glow_with the following settings:


Ds all layers_0_0_100_10_Black
Add name – Gilbert Regular_72_#0000ff_no strokes
Convert to raster
Repeat Gradient Glow:


Add all correct copyright/license information
Save and Enjoy!!

Part 2 – Siggy


Open a 600x250 blank image
FF Black
With your tag you just made still open, position new blank image and the tag beside the layer palette
Highlight tag
Now, starting with the mask, drag each item from tag to new image by clicking on item in layer palette, then while holding down the button, move mouse to blank image and release
Item should now be on new image
Repeat for each item you want on siggy
Position as desired
Highlight black layer
Crop tool – Snap Crop Rectangle To - Layer Opague
Add 3 new layers to top of tag
FF each as follows:
Top: red
Middle: white
Bottom: blue
Back on red layer – select all – Selections – Modify – Contract – 2 - Delete
Highlight White layer - Contract by 2 – Delete
Highlight Blue layer - Contract by 2 – Delete
Select none
Merge red, white, blue layers together
Adjust – Add/Remove Noise – Add Noise – 46
DS all layers_0_0_100_10_Black
Add all correct copyright information
Add name – same steps as for tag

FOR ANIMATION:
Merge firework layers together
Adjust – Add/Remove Noise – Add Noise – 40
Copy merged
Animation Shop – paste as new image
Back to PSP
Undo once
Adjust – Add/Remove Noise – Add Noise – 43
Copy merged
Animation Shop – paste after frame
Back to PSP
Undo once
Adjust – Add/Remove Noise – Add Noise – 46
Copy merged
Animation Shop – paste after frame
Save and enjoy!!!

Part 3 - Avatar


New image 150x150 in psp
FF Black
Drag and drop the Fireworks onto this image and position to your liking
Crop tool – Snap Crop Rectangle To - Layer Opague
Add 3 new layers to top of tag
FF each as follows:
Top: red
Middle: white
Bottom: blue
Back on red layer – select all – Selections – Modify – Contract – 2 - Delete
Highlight White layer - Contract by 2 – Delete
Highlight Blue layer - Contract by 2 – Delete
Select none
Merge red, white, blue layers together
Adjust – Add/Remove Noise – Add Noise – 46
DS all layers_0_0_100_10_Black
Add first letter of name, stretching to fit
Add Gradient Glow
DS
ANIMATION:
Merge firework layers together
Adjust – Add/Remove Noise – Add Noise – 40
Copy merged
Animation Shop – paste as new image
Back to PSP
Undo once
Adjust – Add/Remove Noise – Add Noise – 43
Copy merged
Animation Shop – paste after frame
Back to PSP
Undo once
Adjust – Add/Remove Noise – Add Noise – 46
Copy merged
Animation Shop – paste after frame
Save and enjoy!!!