Showing posts with label FTU. Show all posts

Saturday, September 10, 2022

No Scrap Forum_"Welcome To Angels"


Welcome To Angels


This tutorial was written by me, VCC, on September 09, 2022 using my own ideas. Any resemblance to others is coincidental and accidental. This tutorial assumes you have a working knowledge of psp and is written in PSPX.


**NOTE: This tag was made for a challenge in the Angels Design  forum and  uses a FTU artist who granted Angels Design forum permission to use their artDO NOT use this artists' work unless you have their permission.**


Supplies:

"Red Glove" tube by ikke46 - this is a FTU artist who granted Angels Design forum permission to use their artPLEASE use a suitable tube that you have a license/permission for.


FILTERS:

Xero_Fritillary

DSB Flux_Bright Noise


FONTS:

your choice

Abbreviations:

DS_Drop Shadow

ANL_Add New Layer

EC_Eye Candy

GG_Gradient Glow

AS_Animation Shop

C/P_Copy and Paste

FF_Flood Fill

Ctrl+A_Select All

Ctrl+C_Copy

Ctrl+V_Paste

Ctrl+D_De-select

Ctrl+E_Paste Into Selected Frame/s


Open blank 600x300 canvas

FF with dark color from tube (#6a1c15)

C/P tube

Adjust_Blur_Radial Blur_Spin_60_0_0_0

Duplicate

Close duplicate for now

C/P tube again with the part you wish showing in center

Duplicate

on Duplicate_Gaussian Blur 5

Blend Mode_Overlay

Rectangle Tool_Stroke 5 #6a1c15_Fill closed

Draw a rectangle on the left side of tag, covering the left edge of the tube

Convert to raster

Duplicate_Mirror_Merge Down

Magic Wand_Click inside each of the two rectangle areas

Selections_Modify_Expand 5

Highlight original blur layer

Promote Selection to Layer

Xero_Fritillary_15_30_10_10

Effects_Edge Effects_Enhance

Select none

Blend Mode_Multiple

Rectangle Tool_Stroke 5 #6a1c15_Fill closed

Draw a narrow rectangle across tag

Convert to raster

duplicate

Position below original rectangle as shown

Merge down

Duplicate 3 times (4 layers)

On original_DS_0_0_100_10_Black

On each of the othr 3 layers_DSB Flux_Bright Noise_40

Hit MIX for each layer

Close off the 2 middle layers for now

Using fonts of choice, add any wording/name you would like

Repeat DS

Open the closed blur layer from earlier

Blend Mode_Soft Light

Place directly above the Overlay tube layer

ANL to top_Select All

FF #6a1c15

Selections_Modify_Contract 5

Delete_Select None

Repeat Flux noise and DS

Add all correct copyright/license information


ANIMATING:

Copy/Merged

AS_Paste As New Animation

Back to PSP_Close top noise layer and open middle noise layer

Copy/Merged

AS_Paste After Current Frame

Back to PSP_Close middle noise layer and open bottom noise layer

Copy/Merged

AS_Paste After Current Frame

Save!


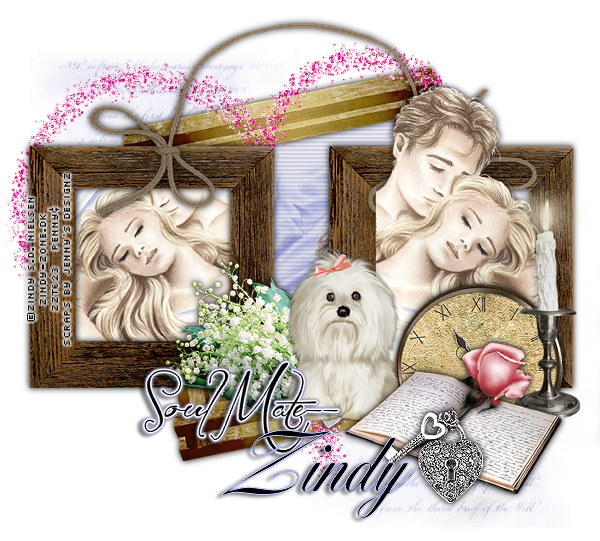
This example uses the awesome art of Cuddly Rigor Mortis.

This tube was available as a bonus for the month of September 2022 at CDO.


Sunday, December 20, 2020

Thursday, November 9, 2017

Puppy Dog Tube

These tubes were made using various selection tutorials, pixel tutorials, and shapes. Some I made years ago, some recently. You are free to use them but please do not share or offer for download. Place a link back here for others to download themselves. You may mix them with other artists' with no credit needed, but if you use only my tubes in your creations, please put ©Venomous Creations www.venomouscreations.blogspot.com. Please do not remove my watermark. Thanks for following these simply terms and enjoy!!

Click and save the png


Ladybug Tube

These tubes were made using various selection tutorials, pixel tutorials, and shapes. Some I made years ago, some recently. You are free to use them but please do not share or offer for download. Place a link back here for others to download themselves. You may mix them with other artists' with no credit needed, but if you use only my tubes in your creations, please put ©Venomous Creations www.venomouscreations.blogspot.com. Please do not remove my watermark. Thanks for following these simply terms and enjoy!!

Click and save the png


Turkey Tube

These tubes were made using various selection tutorials, pixel tutorials, and shapes. Some I made years ago, some recently. You are free to use them but please do not share or offer for download. Place a link back here for others to download themselves. You may mix them with other artists' with no credit needed, but if you use only my tubes in your creations, please put ©Venomous Creations www.venomouscreations.blogspot.com. Please do not remove my watermark. Thanks for following these simply terms and enjoy!!

Click and save the png


Sunday, June 5, 2016

FTU - "Patriotism"

Patriotism


This tutorial was written by me on June 05, 2016, using my own ideas. Any resemblance to others is coincidental and accidental. This tutorial assumes you have a working knowledge of psp and is written in PSPX6. 
 
 
Supplies:
"Revalution" tube by Keith Garvey - tube/license available at Garv-Girls PSP Tubes
Mask 63 by Insatiable Dreams (Mask 4 set)
 
Filters:
No outside filters
 
Fonts:
Carlotta 
 
 
Abbreviations:
DS_Drop Shadow
ANL_Add New Layer
EC_Eye Candy
GG_Gradient Glow
AS_Animation Shop
C/P_Copy and Paste
FF_Flood Fill
 
 
Open blank 600x600 canvas
 
ANL
FF #edd542
Apply mask

C/P GS-Frame 1
Select inside of frame with magic wand
Selections_Expand_2
ANL below frame
C/P GS-Paper 1 into selection
ANL
C/P GS-Paper4 into selection
Select none
Blend Mode_Hard Light
 
C/P MC-E05
C/P MC-E03
C/P MC-E02
Place these as shown
 
C/P tube
Freehand Selection Tool_Select around the parts of tube showing below/to the right of MC-E02
Selections_Modify_Feather_35
Hit delete a few times
Select none
 
Duplicate tube
On original tube_Adjust_Blur_Gaussian 10
Add noise_Uniform 35
 
DS duplicate tube, frame, and each element_0_0_65_25_Black
 
Add all correct copyright/license information
 
Name_ Carlotta_72_Black
DS_0_0_100_5_White
 
Save!!!


Tuesday, December 8, 2015

FTU "Santa's Little Helper"

Santa’s Little Helper


Supplies:
“Gingerbread Man1” by Venomous Creations (this tube was made following a tutorial by Amanda's Home, which is no longer available)
Word Art/Saying of choice
Mask of choice
Filters:
No Outside Filters
Fonts:
St. Nicholas_wording
Bakery_name


Abbreviations:

EC = Eye Candy

GG = Gradient Glow

 DS = Drop Shadow

 C/P = Copy and Paste

 FF = Flood Fill

 ANL = Add New Layer

 AS = Animation Shop
Open blank 600x600 canvas
C/P element 31
Re-size and place in center of tag
Magic Wand_select inside frame
Expand by 5
ANL below frame
C/P paper 3 into selection
Select none
C/P element 34
Re-size ad place as shown
C/P tube
DS tube, frame, and element 34_0_0_74_10_Black
Add word art/saying of choice
DS_0_0_100_10_White
Add all correct copyright/license information
Name_Baskery_48_Black
ANL to bottom of canvas
Select all
C/P paper 5 into selection
Select none
Apply mask
Save!!

FTU Tubes - Christmas

These tubes were made using various selection tutorials, pixel tutorials, and shapes. Some I made years ago, some recently. You are free to use them but please do not share or offer for download. Place a link back here for others to download themselves. You may mix them with other artists' with no credit needed, but if you use only my tubes in your creations, please put ©Venomous
Cherries Creations www.venomouscreations.blogspot.com. Please do not remove my watermark. Thanks for following these simply terms and enjoy!!

Click and save the png


Monday, April 15, 2013

FTU - Tagger's Inc Blog Train Microcephaly Awareness

Microcephaly Awareness


This Train is special Train because its for a friend of Jenn's Designs.
Her son, Joshua, was born with Microcephaly and this is something that he will have to live
with for the rest of his life, he is an adorable little boy, and is a miracle to the world & w
e all feel happy to
take part in this train and create the kit for her.
If you would like to know more information about Microcephaly, you can do so by reading
HERE
Please don't miss any of the awesome stops along the way and leave some love.


Download my part BOX or 4SHARED

Please visit all the awesome stops along the way and help raise awareness for this disorder:

Venomous Creations - You Are Here 
Moonshine Dezinez
Jenny's Designz 
Black Widow Creationz 

Monday, April 1, 2013

FTU Tagger's Inc "Tranquility" Blogtrain

Toot toot!! It's that time again folks!! Time to hop on board the blog train for another awesome series of FTU scrap items!

For the month of April, we chose "Tranquility" anything goes as the theme for the blog train and it really is anything goes!!

Here's my part...kind of a hodge podge of items....and the links to all the other great stops along the way. Please be sure to visit them all and leave some love along the way.


Download BOX or 4SHARED

And here's the road to all the other awesome stops...

2. Venomous Creations  You are HERE

Thursday, January 17, 2013

FTU - Soul Mates


Soul Mates


This tutorial was written by me on January 17, 2013, using my own ideas. Any resemblance to others is coincidental and accidental. This tutorial assumes you have a working knowledge of psp and is written in PSPX.
Please leave some love when downloading supplies. The artists/creators work hard to make/share their work with us, so let's be appreciative. Please use all correct copyright information and follow all TOU’s. Let’s give credit where credit is due.
As always, tutorials are only a guideline. If you don't have the exact supplies, use ones you have or ones you choose.


Supplies:

“Temporary Peace” FTU tube by Zindy S. D. Nielsen
“Soul Mates” FTU Scrap Kit by Jenny’s Designz
“Soul Mates” ClusterFrame by me
Brush of choice
Font_ Yonkers

Abbreviations:
EC = Eye Candy
GG = Gradient Glow
DS = Drop Shadow
C/P = Copy and Paste
FF = Flood Fill
ANL = Add New Layer
AS = Animation Shop


Open frame in psp
Add new layer at bottom
Apply brush using #989ed3
Open tube in psp
C/P the image that comes with this tube ANL
Select the opening of the large back frame
ANL, FF with #989ed3
Blinds_4_43_ #999bd2_Horizontal
Position image so parts you like show thru (I positioned mine so only the purple ripple background was showing)
Promote to layer
Select none
Change blend mode of image layer to Multiply
Select the opening of the left square frame
Position the image again
Promote to layer
Select none
Duplicate_Mirror
Delete image
C/P the tube and position over the right square opening
Erase any parts you do not want showing
DS_0_0_100_10_Black
C/P the word art, “Soul Mate” from the scrap kit (I applied a small purple gradient glow to word art but you can do same with a purple DS)
DS_2_-5_50_5_Black
Position as shown
Add all correct copyright/license information
Add name_Yonkers_100_stroke 1 #989ed3_fill Black
Sharpen
DS_2_-5_50_5_Black
Save!


Wednesday, November 28, 2012

FTU - Pumpkin Pie


Pumpkin Pie


This tutorial was written by me on November 28, 2012, using my own ideas. Any resemblance to others is coincidental and accidental. This tutorial assumes you have a working knowledge of psp and is written in PSPX.
Please leave some love when downloading supplies. The artists/creators work hard to make/share their work with us, so let's be appreciative. Please use all correct copyright information and follow all TOU’s. Let’s give credit where credit is due.
As always, tutorials are only a guideline. If you don't have the exact supplies, use ones you have or ones you choose.


Supplies:

“Perfect Thanksgiving” tube by Leonardo Preda available at indie-Zine
“Saturday’s Child” FTU scrap kit mini by Designs by Jen Yurko (this was a Facebook Fan Freebie in November 2012)
Mask of choice
Fonts_Ænigma Scrawl (BRK) for saying and Lydia Puente)  for name


Abbreviations:
EC = Eye Candy
GG = Gradient Glow
DS = Drop Shadow
C/P = Copy and Paste
FF = Flood Fill
ANL = Add New Layer


Open blank 600x600 canvas
ANL_select all_C/P paper 8 into selection
ANL again_C/P paper 5 into selection_select none
Apply mask to each paper layer
C/P frame_Duplicate for 3 layers
Back layer_free rotate left_10
Middle layer_free rotate right_10
Leave top frame as is
C/P tag 4
Add the following elements:
Bird
Button 2
Flower 1
Flower 2
Ribbon
Using Ænigma Scrawl (BRK), type out your message
C/P tube
Add all correct copyright/license information
Add name_Lydia Puente)_125_#e2792c
Duplicate_Convert duplicate to raster
On original text_change to black
Tap arrow left key 3 times then arrow down key 3 times
Convert to raster
DS all layers EXCEPT orange name and saying_0_0_100_10_Black
Save!!!


Sunday, November 18, 2012

FTU - Autumn Friends


Autumn Friends


This tutorial was written by me on November 18, 2012, using my own ideas. Any resemblance to others is coincidental and accidental. This tutorial assumes you have a working knowledge of psp and is written in PSPX.
Please leave some love when downloading supplies. The artists/creators work hard to make/share their work with us, so let's be appreciative. Please use all correct copyright information and follow all TOU’s. Let’s give credit where credit is due.
As always, tutorials are only a guideline. If you don't have the exact supplies, use ones you have or ones you choose.


Supplies:
“Thanksgiving 2010” tube by Keith Garvey
“Autumn Leaves” FTU scrap kit by Twinky Dezines Scrap
Becky Mask 23
Font_Bon Jovi

Abbreviations:
EC = Eye Candy
GG = Gradient Glow
DS = Drop Shadow
C/P = Copy and Paste
FF = Flood Fill


Open blank 600x600 canvas
Add new layer_Select all
C/P paper 6 into selection_select none
Apply mask
C/P frame 2
Using selection tool, select a rectangle around inside of frame
Add new layer below frame_C/P paper 8 into selection
Select none
C/P tube
Duplicate frame_move duplicate above tube layer
Erase any of the frame you don’t want showing over tube (make it look like tube is behind the ribbon)
C/P Tree_move below original frame
C/P Leaves Swirl 2_rotate right 90_ place as shown
C/P Lantern_ place as shown
C/P Flower 2_Duplicate and place as shown
Add all correct copyright/license information
Add name_Bon Jovi_48_stroke 2 #a44808_fill Black_convert to raster
Select all_float_de-float_contract by 2_invert
Noise_100_select none
DS all layers_0_0_100_10_Black
Save!!


Thursday, October 25, 2012

FTU - Red Love


Red Love

 
This tutorial was written by me on October 25, 2012, using my own ideas. Any resemblance to others is coincidental and accidental. This tutorial assumes you have a working knowledge of psp and is written in PSPX.
Please leave some love when downloading supplies. The artists/creators work hard to make/share their work with us, so let's be appreciative. Please use all correct copyright information and follow all TOU’s. Let’s give credit where credit is due.
As always, tutorials are only a guideline. If you don't have the exact supplies, use ones you have or ones you choose.
 
 Supplies:
 
“Red” tube by Guillaume Roos available at indie-Zine
“A Woman Scorn” FTU scrap kit by Jenny’s Designz
Becky Mask 23
Font_UnZialish
 
 
Abbreviations:
EC = Eye Candy
GG = Gradient Glow
DS = Drop Shadow
C/P = Copy and Paste
FF = Flood Fill


Open blank 600x600 canvas
Add new layer – FF #fb0000
Apply mask
C/P Frame 3 as new layer – select inside of frame
Add new layer below frame
FF with gradient made with red and black_45_3_Radial – select none
C/P tube – position as desired
C/P the following elements:
Black Corset
Flower 5
Rose 2
Add all correct copyright/license info
Add name_UnZialish_100_stroke 2 #fb0000_fill black
DS all layers_0_0_100_10_Black
Save!!


Thursday, October 4, 2012

FTU - BCA Awareness "Be Pink"


Be Pink


This tutorial was written by me on October 04, 2012, using my own ideas. Any resemblance to others is coincidental and accidental. This tutorial assumes you have a working knowledge of psp and is written in PSPX.
Please leave some love when downloading supplies. The artists/creators work hard to make/share their work with us, so let's be appreciative. Please use all correct copyright information and follow all TOU’s. Let’s give credit where credit is due.
As always, tutorials are only a guideline. If you don't have the exact supplies, use ones you have or ones you choose.


Supplies:

“Exclusive 1" tube by Sweet Pin-Up available at indie-Zine
“BCA 2009” FTU scrap kit by Bluedream Designs
Mask of choice - I used “I Love You” mask
Eye Candy 4000_Gradient Glow
Font_Vani


Abbreviations:
EC = Eye Candy
GG = Gradient Glow
DS = Drop Shadow
C/P = Copy and Paste
FF = Flood Fill


Open blank 600x600 canvas
Add new layer – select all
C/P paper 3 into selection – select none
Apply mask
C/P Frame 3
Select inside – expand by 5
Add new layer below frame
C/P paper 2 into selection – select none
C/P the following elements, duplicating, mirroring, placing as shown:
Box 2
Cloud
Charm 1
Diamond Rain
Feather Flower 1
Flower 1
Flower 3
Flower 4
Journal
Label 2
Pearls
Pearls 2
C/P tube
Add all correct copyright/license information
Add name_Vani_72_stroke 1 #f06a9b_fill Black
EC 4000_GG_3_25_100_White
DS_2_-5_50_5_Black
DS all other layers_0_0_100_10_Black
Save!!