Showing posts with label Designs By Vaybs. Show all posts

Friday, December 2, 2016

FTU "Santa's Mail


Santa's Mail


This tutorial was written by me on December 02, 2016 using my own ideas.

Any resemblance to others is coincidental and accidental.

This tutorial assumes you have a working knowledge of psp and is written in PSPX6.


Supplies:

"Christmas Gift 2012" tube by William Rumley - tube/license currently available at ADI


Grunge Brush of choice (optional)


Filters:

Xenofex 2_Crumple and Burnt Edges


Fonts:

ShelleyVolante BT


Abbreviations:

DS_Drop Shadow

ANL_Add New Layer

EC_Eye Candy

GG_Gradient Glow

AS_Animation Shop

C/P_Copy and Paste

FF_Flood Fill


Open blank 600x400 canvas

ANL_FF #0c7312

Apply mask

Custom Selection:


FF with a gradientmade with #fefcf6 and #ece8d3_angle 0_repeats 0

Xenofex 2_Crumple:


Xenofex 2_Burnt Edges:


This is our "paper"

Select All_Float_De-Float

Selections_Modify_Contract 2

ANL Apply Grunge Brush of choice (I added jsut a touch on the top left corner)

Select none

Merge brush layer to paper layer

C/P word art, re-sizing and placing on paper

Merge word art and paper together

Pick Tool_Rotate slightly

C/P element 21, placing below and to the top left of the paper

C/P element 49, placing between element 21 and the paper

C/P element41, re-size and place to the bottom right above paper

C/P element 33, placing above and to the left bottom of paper

C/P element 17, placing to the right of the paper

C/P tube placing as shown

Sharpen each layer

DS paper and elements_0_0_75_15_Black

DS tube_10_10_35_15_Black

Add all correct copyright/license information

Name_ShelleyVolante BT_72_Black

DS_2_5_100_5_#bfdac1

Save!!


Friday, November 27, 2015

Animated No Scraps - "Winter Deer"


Winter Deer


This tutorial was written by me on November 27, 2015, using my own ideas. Any resemblance to others is coincidental and accidental. This tutorial assumes you have a working knowledge of psp and is written in PSPX6.


Supplies:
“bt-babyrudolph” tube by Becca Turner – tube/license currently available at ADI
This tube was also available in a combo pack, "bt-xmasspecial" with Becca's "Candy" tube for Christmas 2015
“WhiteForestSky” tube by Rainbow Coffi_Rainbow Coffi's site is currently unavailable
Animated Snow gif of choice

Filters:
Eye Candy 4000_Gradient Glow

Fonts:
BankGothic Lt BT


Abbreviations:
EC = Eye Candy
GG = Gradient Glow
DS = Drop Shadow
C/P = Copy and Paste
FF = Flood Fill
ANL = Add New Layer
AS = Animation Shop

When working with templates, always Shift+D to duplicate, close original, then on each layer, select with magic wand (or Select All, Float, De-float), ANL, close/delete the original, do steps required in tutorial, select none


Starting at bottom

ANL
FF with gradient made with #526f7d and #d7edfb_Radial_90_3
Apply mask
Enlarge 111% twice
Duplicate
Merge mask layers together
Adjust_Add Noise_60

Raster 1_Leave as is

Raster 9_Leave as is

Raster 2_Leave as is

Raster 3_Using Change To Target Brush and #800000, swipe over layer
Using Magic Wand, select dark outer frame area
Adjust_Add noise 60
Select none
Select the center area
Effects_Texture:


Select none
Duplicate
On original layer_Adjust_Blur_Gaussian Blur_10
Effects_Texture Effects_Weave:


Raster 4_Close/Delete

Raster 5_ Repeat color change
C/P Rainbow Coffi tube
Re-size and place to your liking
If the snow on the tube does not reach the bottom of the globe, ANL below tube
Make a selection with the Freehand Selection Tool around bottom of snow and open area of globe
FF White
Select none
Merge tube and white layer
Blend Mode_Luminance (Legacy)
DS__0_0_50_10_Black
Using magic wand, select outside raster 5
Highlight tree tube layer
Delete
Select none
Merge with raster 5

Raster 6_ Leave as is

Raster 7_ Repeat color change
Duplicate
Move below Raster 5
Adjust_Blur_Motion Blur_135_50
Repeat Weave

Repeat DS on rasters 2, 3, 7

C/P Rudolph tube
Mirror
Re-size 85% 5 times
Place as shown
Duplicate
On original, Gaussian Blur_10
Repeat Weave effect

Repeat DS on tube copy
Merge tube and tube copy together
Duplicate
Mirro
Re-size 85%  3 times
Place in bottom left

C/P word art
Duplicate
Highlight original word art layer
EC 4000_GG_3_25_100_White
Add Noise_60
DS_2_5_30_5_Black
Merge word art layers together

Add all correct copyright/license information

Ellipse Tool_stroke 3 Black_Fill closed
Draw a circle the same size as the inner ring of raster 7
Do Not Convert
Highlight top layer in pallette

Name_ BankGothic Lt BT_30_Black
Hover mouse over ellipse until the half circle shows under the A
Click and add name
Position to your liking
Convert to raster
DS_2_5_50_5_Black
Delete vector ellipse layer


ANIMATING

Open Animation Shop
Open snow animation of choice
Edit_Select All

In PSP
Copy Raster 5

AS
Paste As New Animation
Duplicate so you have 1 more number of frames than snow animation
Click on frame 2
Hold Select button and click on remaining frames

Copy snow animation
Click in frame 2 of raster 5 image
Paste Into Selected Frame

Copy

Back to PSP
Paste As New Image
Magic Wand_highlight  layer without snow
Click in blank areas outside image

Click delete on each snow layer
This will leave snow only in the circle
Delete the layer without snow
Save as a psp image

In AS
Open the image you just saved
Edit_Select all

In PSP
Close copyrights, name, word art, both tube layers, raster 7, raster 6
Copy Merged

IN AS
Paste As New Animation
Duplicate to same number of frames as snow image
Edit_Select All

Copy snow image
Right Click in frame of saved image
Paste Into Selected Frame
Line the snow circle with the blank circle area
Left click when happy

In PSP
Open the closed layers and close the others
Copy Merged

In AS
Paste As New Animation
Copy

In AS Tool Bar_Click Propagate Paste button

Highlight animation frames
Right Click in frame
Paste Into Selected Frame

View_Animation
If happy, save!!!


Thursday, November 12, 2015

FTU Facebook Header, Forum Set - "Jingle Bells"


Jingle Bells


This tutorial was written by me on November 12,2015, using my own ideas. Any resemblance to others is coincidental and accidental. This tutorial assumes you have a working knowledge of psp and is written in PSPX6.


Supplies:

ty-joysanta” tube by Ty Wilson – tube/license currently available at ADI

To The North Pole” FTU scrap kit by Designs by Vaybs


Filters:

Willy_Takinami Bamboo Web

Mura’s Meister_Copies

Eye Candy 4000_Gradient Glow


Fonts:

Devo


Abbreviations:

EC = Eye Candy

GG = Gradient Glow

DS = Drop Shadow

C/P = Copy and Paste

FF = Flood Fill

ANL = Add New Layer

AS = Animation Shop


Open blank 850x320 canvas


Make a gradient using #ee3b34 and #008f48_Radial_0_6

Willy_Takinami Bamboo Web_150_55

Effects_Edge Effects_Enhance


C/P element 17

Place on right side

Blend Mode_Burn


Duplicate_Mirror


Text Tool_type out your saying

Mura’s Meister_Copies_Tiling (angle)_change Tile Gap to 5

Blend Mode_Soft Light

Opacity_50


C/P element 33

Re-size 85%  7 times

Mura’s Meister_Copies_Encircle:


Position in center of tag


Selection Tool_Select around thru the middle of the wreath

ANL below wreath

C/P paper 1 into selection

Select none


C/P various elements of choice, re-sizing and placing where you like


C/P element 13 to top center of wreath


C/P element 11 placing as shown


C/P tube placing as shown

EC 4000_GG_3_25_100_White


DS Santa, wreath, element 13, element 11 wreath elements_0_0_75_15_Black


ANL to top

FF Black

Select All_Contract 4_Delete_Select none

EC 4000_GG_3_25_100_#ee3b34

Repeat GG changing color to #008f48

DS_0_0_100_10_Black

Repeat DS


Add all correct copyright/license information


Save!!


SIGNATURE TAG


Duplicate header

Re-size_600x250


Sharpen each layer if needed


Make sure copyright/license information is legible


Name_DEVO_48_Black

EC 4000_GG_3_25_100_#008f48


Save!!!


AVATAR


Open blank 150x150 canvas

C/P element 11

Re-size so it fits nicely on small canvas

Sharpen

DS_0_0_75_15_Black


Type initial

Repeat same GG as for the name on the signature


Save!!!


Monday, October 19, 2015

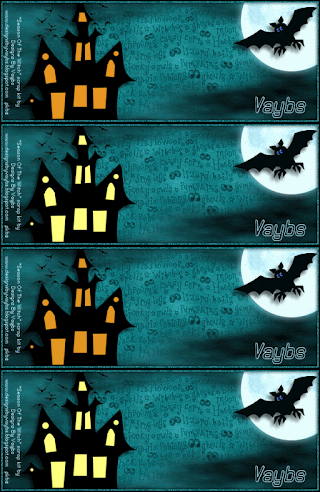
Animated FTU Forum - "Hallow's Night"


Hallow's Night


This tutorial was written by me on October 05,2015, using my own ideas. Any resemblance to others is coincidental and accidental. This tutorial assumes you have a working knowledge of psp and is written in PSPX6.


Supplies:


Mask 23 by Becky (or a mask like it of choice since Becky is no longer offering her masks for download)


Filters:

Mura's Meister_Cloud


Fonts:

Neural Outline (BRK)


Abbreviations:

EC = Eye Candy

GG = Gradient Glow

DS = Drop Shadow

C/P = Copy and Paste

FF = Flood Fill

ANL = Add New Layer


Open blank 600x250 canvas


Set your foreground to #209099


ANL

Mura's Meister_Cloud:


Open paper 3

Shift+D_close original

Promote background to layer

Apply mask

Re-size 85%

C/P ANL onto main canvas

Apply mask again

Re-size again if needed

Duplicate twice

Merge mask layers together


C/P haunted house placing to the left

Using magic wand, click inside each opening

Selections_Modify_Expand 3

ANL beneath house

FF #e19723

ANL

FF #ffff80

Close this layer for now

Select none


C/P moon

Re-size and place in top right corner


C/P bat

Place as shown


ANL to top of canvas

FF #1c8890

Select All

Contract 5_Delete

Add noise_35

Select All

ANL

FF Black

Contract 3_Delete_Select none

DS noise frame_0_0_100_10_Black


DS house and bat_3_-7_65_10_Black


Add all correct copyright/license information


Name_Neural Outline (BRK)_48_#b3e3f2


ANIMATING


Copy Merged


AS_Paste As New Animation


PSP

Close Orange window layer

Open Yellow window layer


Copy Merged

AS_Paste After Current Frame


Highlight frame 1

Copy

Highlight frame 2

Paste After Current Frame


Highlight frame 2

Copy

Highlight frame 3

Paste After Current Frame

You should have:

Frame 1: Orange windows

Frame 2: Yellow windows

Frame 3: Orange Windows

Frame 4: Yellow windows


Highlight frame 1

Animation_Frame Properties_50


Animation_View Animation


If happy, Save!!!


Wednesday, September 25, 2013

FTU - Colors Of Autumn

Colors of Autumn


This tutorial was written by me on September 25, 2013, using my own ideas. Any resemblance to others is coincidental and accidental. This tutorial assumes you have a working knowledge of psp and is written in PSPX.
Please leave some love when downloading supplies. The artists/creators work hard to make/share their work with us, so let's be appreciative. Please use all correct copyright information and follow all TOU’s. Let’s give credit where credit is due.
As always, tutorials are only a guideline. If you don't have the exact supplies, use ones you have or ones you choose.


Supplies:

“Punkin Pie” tube by TanDoll – license/tube available at ADI
“Fall” FTU scrap kit by Designs By Vaybs
Template 46 by Twyzted T's Playground
Mask 309  by Vix
Eye Candy 4000_Gradient Glow
Xero_Fritillary and Titanium
Penta.com_Color Dot
Font_Grinched
                         

Abbreviations:
EC = Eye Candy
GG = Gradient Glow
DS = Drop Shadow
C/P = Copy and Paste
FF = Flood Fill
ANL = Add New Layer
AS = Animation Shop


For each layer:

Select shape with magic wand
Smooth 20/20
ANL
C/P paper into selection
Add filters/effects
Select none

Drop Shadows (unless otherwise noted):

Paper layers_DS_0_0_100_10_Black
Dotted lines_ DS_0_0_100_5_Black


Starting at bottom of canvas:

Raster 8 – FF #3c5d45
Penta.com_Color Dot_Default

Raster12 – Select All_Float_De-float
ANL above this layer
FF #ffff40
Invert_Delete
Select none


Raster 7 – paper 9_Xero_Fritillary_5_30_10_20

Raster 6 – paper 3_Xero_Titanium_Default
Effects_Edge effects_Enhance

Raster9 – Select All_Float_De-float
ANL above this layer
FF #ffff40
Invert_Delete
Select none


Raster 4 – Select all_Float_De-float_FF #fe6233
Add noise_45
DS_0_0_100_10_Black
Repeat DS 4 times

Raster 5 – FF #fe6233

Raster 2 – Effects_Texture Effects_Weave_1_9_1_Both boxes White
EC 4000_GG_3_25_100_ #ffff40

Raster 3 – FF #fe6233_add noise_45

Raster 10 and 11 – Merge together
Select All_Float_De-float
ANL above this layer
FF #ffff40
Invert_Highlight colored layer_Delete
Select none


Raster 10 – Add noise_100

ANL to bottom of canvas
Select all_C/P paper 16 into selection_select none
Apply mask
Duplicate_Mirror_Flip

Add tube placing in center of template
Adjust_Sharpen
DS_0_0_60_24_Black

Add any elements, re-sizing and placing as desired/shown
I chose:
Element #52 (wire) placed between Raster 16 and Raster 7
Adjust_Sharpen more
DS_0_0_100_5_Black
Element #56 (leaves) duplicate, mirror_place below tube so it looks like it is sitting in the leaves
duplicate_re-size_Duplicate_mirror
(you should have 4 leaf layers)
DS each leaf layer_0_0_100_10_Black
Merge all leaves together
Duplicate merged layer_place between Raster 7 and Raster 6
Duplicate_mirror

Add all correct copyright/license information

Name_Grinched_100_stroke 1 #c0c000_Fill #b43a1c
DS_2_5_50_5_Black

Save!!


Wednesday, May 15, 2013

FTU - Red Hot

Red Hot


This tutorial was written by me on May 15, 2013, using my own ideas. Any resemblance to others is coincidental and accidental. This tutorial assumes you have a working knowledge of psp and is written in PSPX.
Please leave some love when downloading supplies. The artists/creators work hard to make/share their work with us, so let's be appreciative. Please use all correct copyright information and follow all TOU’s. Let’s give credit where credit is due.
As always, tutorials are only a guideline. If you don't have the exact supplies, use ones you have or ones you choose.


Supplies:

“Roxana” tube by Roman Zaric
“Skull Candies” FTU scrap kit by Designs by Vaybs
Mask of choice
Eye Candy 4000_Gradient Glow
Font_H@ppy


Abbreviations:
EC = Eye Candy
GG = Gradient Glow
DS = Drop Shadow
C/P = Copy and Paste
FF = Flood Fill
ANL = Add New Layer
AS = Animation Shop


Open blank 600x600 canvas
ANL_Select All
C/P paper 13 into selection
Select none

C/P element 65
Place element 60 on left side of frame
Duplicate_Mirror_place to the right side of frame
Highlight frame layer_select all_float_de-float
Erase parts of the 2 stars so it looks like they are clipped onto the frame
Select none

C/P 61, 62, and 63 stair stepping as shown
Merge together

C/P tube placing so her hands sit on one of the blocks
Select a portion of her lower legs
Feather 34_delete to soften the edges
Select none

C/P the following elements, re-sizing, duplicating, mirroring, and placing as shown:
75 – place above the ribbon (81)
79
80
81 – place on lower portion of frame

Add all correct copyright/license information

Add name_H@ppy_72_Black

EC 4000_GG_3_25_100_#800000
Sharpen a few times ‘til it’s as bright as you like

DS_Name_0_5_50_5_Black
DS all other layers_0_0_75_25_Black

Save!!


Friday, January 4, 2013

FTU - Steampunked Lois


My mojo seems to have taken a vacation!! LOL Finally had some ideas and here is my first tutorial of the new year. :)

Steampunked Lois


This tutorial was written by me on January 04, 2013, using my own ideas. Any resemblance to others is coincidental and accidental. This tutorial assumes you have a working knowledge of psp and is written in PSPX.
Please leave some love when downloading supplies. The artists/creators work hard to make/share their work with us, so let's be appreciative. Please use all correct copyright information and follow all TOU’s. Let’s give credit where credit is due.
As always, tutorials are only a guideline. If you don't have the exact supplies, use ones you have or ones you choose.


Supplies:

“Lois” tube by Roman Zaric available at his store HERE
“Steampunked Time” FTU scrap kit by Designs By Vaybs
Monti's Blinds Mask
Eye Candy 4000_Gradient Glow
Font_Ol Cowboy Demo


Abbreviations:
EC = Eye Candy
GG = Gradient Glow
DS = Drop Shadow
C/P = Copy and Paste
FF = Flood Fill

ANL = Add New Layer

AS = Animation Shop


Open blank 600x600 canvas
ANL_Select all
C/P paper 6 into selection_select none
Apply mask
C/P element 4
C/P frame 6
Select inside_expand by 5
ANL below frame
C/P paper 7 into selection_Keep selected
C/P tube close up as new layer
Position so parts you like show inside frame
Promote selection to layer_select none
Change blend mode of tube to Overlay and reduce opacity to 50
C/P the following elements, duplicating and resizing as needed:
2
4
5
6
8
11
12
27
32
C/P tube
Add all correct copyright/license info
Add name_Ol Cowboy Dem_72_Black
EC 4000_GG_3_25_100_#655f25
Sharpen more 3 times
Duplicate name
DS original name and all other layers_0_0_100_10_Black
Save!!


Saturday, October 27, 2012