Chained


This tutorial was written by me on June 02,2015, using my own ideas. Any resemblance to others is coincidental and accidental. This tutorial assumes you have a working knowledge of psp and is written in PSPX6.
Supplies:
FTU scrap kit "Party in The City" by Tasha'sPlayground
Filters:
Eye Candy 4000_Gradient Glow
Xero_Frittilary and Porcelain
Xenofex 2_Constellation
Fonts:
AR JULIAN
Abbreviations:
EC = Eye Candy
GG = Gradient Glow
DS = Drop Shadow
C/P = Copy and Paste
FF = Flood Fill
ANL = Add New Layer
AS = Animation Shop
Re-size template 600x600
Top Square_FF #800000
Noise 25
EC 4000_GG_3_25_100_#ebe9f2
Sharpen
DS_0_0_75_20_Black
Bottom Square_FF #c00000
Noise 25
EC 4000_GG_3_25_100_#ebe9f2
Sharpen
DS_0_0_75_20_Black
Pink Strip_Xero_Frittilary_5_30_10_40
DS_0_0_75_20_Black
Pink Strip_Xero_Frittilary_5_30_10_40
DS_0_0_75_20_Black
Black Rectangle_Leave As Is
DS_0_0_75_20_Black
C/P Gem
Re-size 50% 3 times
Sharpen More
Place at top of Black Rectangle
Duplicate
Place at bottom of Black Rectangle
Large White Circle_FF #42201e
Noise_Uniform 50
DS_0_0_75_20_Black
Inner Circle Frame_Noise_50_Sharpen
Large Pink Circle_paper 6
DS_0_0_75_20_Black
C/P Stars Element
Blend Mode_Overlay
DS_0_0_75_20_Black
Large Pink Rectangle_paper 7
DS_0_0_75_20_Black
C/P Frame
Re-size
Using nodes, stretch to fit left edge of paper 7 rectangle
as shown
Selection Tool_Select frame area that shows above White
Strip
Delete
Select None
Sharpen
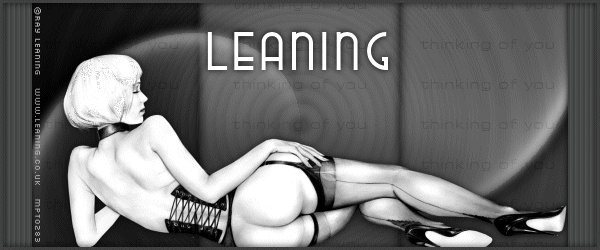
C/P tube
Re-size 85% 6 times
Place on the left side of tag over the circles so parts you
want showing are within the circles
Select each gray circle with magic wand
Invert
Highlight tube layer
Delete
Select none
Blend Mode of tube layer_Soft Light
Opacity_50
Make a gradient
#42201e and #9c7c7d
Angle 45
Repeats 2
**Bottom Circle_FF with gradient
Bottom Circle Overlay_Blend Mode_Overlay
Bottom Circle Frame_FF #42201e
Noise 50
DS_0_0_75_20_Black **
Repeat from ** to ** for Middle and Top Circles, Overlays,
and Frames
Be sure tube is below frames and overlays
C/P Lips
Re-size 50%
Sharpen
Place as shown
DS_0_0_75_20_Black
Black Strips_Leave As Is
White Strips_FF #9c7c7d
Xenofex 2_Constellation:

Words_Leave As Is
C/P tube
Xero_Porcelain_50_128_138_0_0_255
DS_3_-22_50_28_Black
Add all correct copyright/license information
Name_ AR JULIAN_ #ff0000_72
DS_0_0_100_10_Black
Repeat DS
Save!!