
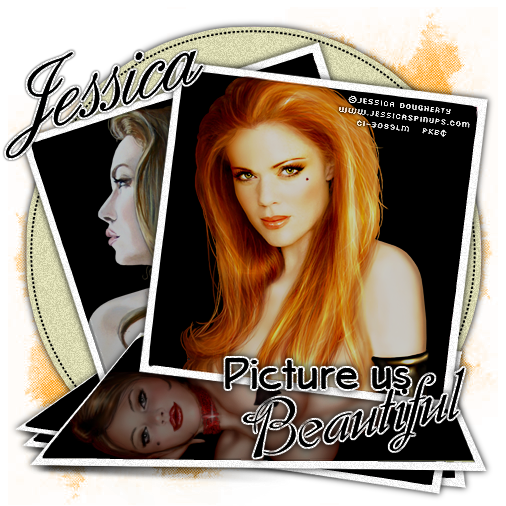
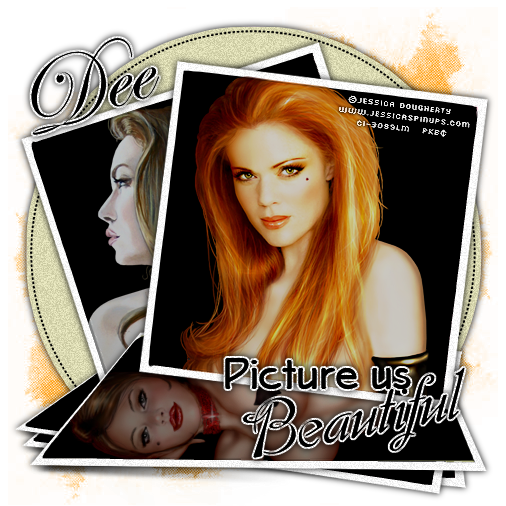
Picture
This
tutorial was written by me on October 03,2014, using my own ideas. Any resemblance to others is
coincidental and accidental. This tutorial assumes you have a working knowledge
of psp and is written in PSPX.
Please leave some love when downloading
supplies. The artists/creators work hard to make/share their work with us, so
let's be appreciative. Please use all correct copyright information and follow
all TOU’s. Let’s give credit where credit is due.
As always, tutorials are only a guideline. If
you don't have the exact supplies, use ones you have or ones you choose.
Supplies:
3 tubes of choice by same artist (These are by JessicaDougherty which I purchased from CILM. Ms. Dougherty’s tubes are currently
available at CDO)
Template 126 "Picture Us" by Dee of Dangerously Delicious Designz
Word Art or Wording of choice
Grunge brush of choice
3 fonts of choice
Abbreviations:
EC = Eye Candy
GG = Gradient Glow
DS = Drop Shadow
C/P = Copy and Paste
FF = Flood Fill
ANL = Add New Layer
AS = Animation Shop
When working with templates, always Shift+D to
duplicate, close original, then on each layer, select with magic wand (or
Select All, Float, De-float), ANL, close/delete the original, do steps required
in tutorial, select none.
Open template
Shift+D
Close original
Do the following steps on the listed layers:
Top Right Pink, Top Flat Green, Top Left Pink, Middle Flat
Purple, Bottom Flat Pink:
Select with magic wand
Smooth_20
FF Black
Select none
Top Right Pink:
Select
Smooth_20
C/P tube of choice placing as you like
Invert_Delete
Select none
Repeat for Top Flat Green, Top Left Pink
Bottom tubes_opacity 36
Top _opacity 65
Top Right White, Top Flat White Frame, Top Left White,
Middle Flat White Frame:
Select
Bottom White Frame_ Smooth_20
Add Noise_Uniform 50
Select none
Purple Circle:
Select
Smooth_20
FF a light color to match tubes (#dad9b1)
Add noise_Uniform 50
Select none
ANL to bottom
Apply brush of choice using a contrasting color to match
tubes
Type out message using black
Convert to raster
Select all_Float_De-float_Expand by 2
ANL below wording
FF White
Repeat Noise
Select none
Apply DS_0_0_100_10_Black to noise wording layer, back
circle, and each of the frame layers
Add all correct copyright/license information
Name_English_100_Black
Place as shown
Repeat same steps as for wording
Repeat DS
Save!!!
No comments:
Post a Comment