
Days

This tutorial was
written by me on October 23, 2013, using my own ideas. Any resemblance to others is
coincidental and accidental. This tutorial assumes you have a working knowledge
of psp and is written in PSPX.
Please leave some
love when downloading supplies. The artists/creators work hard to make/share
their work with us, so let's be appreciative. Please use all correct
copyright/license information and follow all TOU’s. Let’s give credit where
credit is due.
As
always, tutorials are only a guideline. If you don't have the exact supplies,
use ones you have or ones you choose.
Supplies:
Forum Set 016 Template by Gaby
(I cannot find a direct link to Gaby's temps, but the download link for this template can be found in one of Gaby's tutorials HERE)
(I cannot find a direct link to Gaby's temps, but the download link for this template can be found in one of Gaby's tutorials HERE)
VanDerLee_Unplugged X_Compose
Visual Manipulation_Transmission
Screenworks_Hollow Dot
Xero_Fritillary
Fonts_Impact, Pixelette, CheckFontMedExt
Abbreviations:
EC = Eye Candy
GG = Gradient Glow
DS = Drop Shadow
C/P = Copy and Paste
FF = Flood Fill
ANL = Add New Layer
AS = Animation Shop
When working with templates, Shift+D to duplicate,
close original, then on each layer, select with magic wand (or Select All,
Float, De-float), ANL, close/delete the original, do steps required in tutorial,
select none.
Re-size template to 600x250
Starting at bottom:
Background: FF with a gradient using #8a1d17 and #412e27_Angle
45_Repeats 1
VanDerLee_Unplugged X_Compose_Default
Repeat
Rectangle 1 Background:
FF #412e27
Visual Manipulation_Transmission:

Using magic wand, select the light stripes
Screenworks_Hollow Dot_Default
Select none
Using magic wand, select the dark stripes
Xero_Fritillary:
Select none
Select original rectangle again
C/P tube close up and place as shown
Invert_Delete_Select none
Blend mode_Overlay
Rectangle 2 Background:
Repeat above steps, mirroring the tube close up
Rectangle Frames:
FF #8a1d17
Lines:
FF #66472e
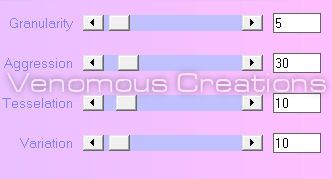
Noise_6
Blinkie 1:
Noise 80
Blinkie 2:
Noise_85
Blinkie 3:
Noise 90
Wordart:
Delete original
Font_Impact_60_#8a1d17
Type “DAYS” stretching to fit
Convert to raster
Wordart mini:
Delete original
Font_Pixelette_8_#c0af81
Type your message
Convert to raster
Frame:
Do not delete original frame
ANL above frame
FF #8a1d17
Blend mode_Overlay
On original frame_DS
C/P tube
Place to the right beneath the frame
DS_0_0_100_35_Black
DS original frame, Rectangle Frames, Lines,
Wordart_0_0_100_10_Black
Add all correct copyright/license information
Name_CheckFontMedExt_72_stroke1 #c0af81_fill #8a1d17
Repeat DS
Close Blinkie layers 2 and 3
Copy merged
AS_Paste as new layer
Back to PSP
Close Blinkie layer1
Copy merged
AS_Paste after current frame
Repeat for Blinkie layer 3
Save!!
AVATAR
You can either repeat the steps for the sig above, or use
the drag and drop method (which is what I did)
*Drag and drop method;
Highlight the sig tag
Click on layer you want to drag_hold down the mouse
button_move mouse to new canvas_release button and layer you drug should be
there
Re-size and sharpen each layer if needed
When finished adding the layers, crop to layer opague*
Frame_Repeat the steps we used for the sig tag
Repeat the noise on the blinkie layers
Add the first letter of name
Animate as above
Save!!
No comments:
Post a Comment